Salesforce Integration: Field Mapping
For advanced teams that need granular control of what data goes where, need to populate default values, or want to use RocketReach to update their Salesforce data, please review this guide on how to set the field mapping for the Salesforce integration.
📑 Contents of this article (click to jump to section):
- Starting Requirements
- How can I manage my Salesforce mapping options?
- Table Breakdown
- Important Notes about Salesforce Custom Mapping
- Can all Salesforce Fields be mapped using RocketReach's data?
- Testing your Custom Mapping
Starting Requirements
Before you dive into the actual steps, please check the following prerequisites.
Supported Plans
RocketReach offers custom mapping for the Salesforce integration only with Ultimate and Custom plans.
User Role
Only Team Owners and Team Admins are able to change field mappings. Any custom mappings set by a Owner or Admin will be automatically applied to all members of the team who use the Salesforce integration.
Non-admin team members can see the Salesforce field mappings but cannot make changes (view-only permission).
Connect Salesforce
Each user/member of a team must connect Salesforce in order to use the integration and take advantage of custom mappings.
When you first integrate RocketReach and Salesforce, your mappings will default to the fields you have already created in Salesforce. This allows you to determine what data from RocketReach is assigned to what field in Salesforce.
🔗 Learn more: How do I connect my RocketReach account to Salesforce?
How can I manage my Salesforce mapping options?
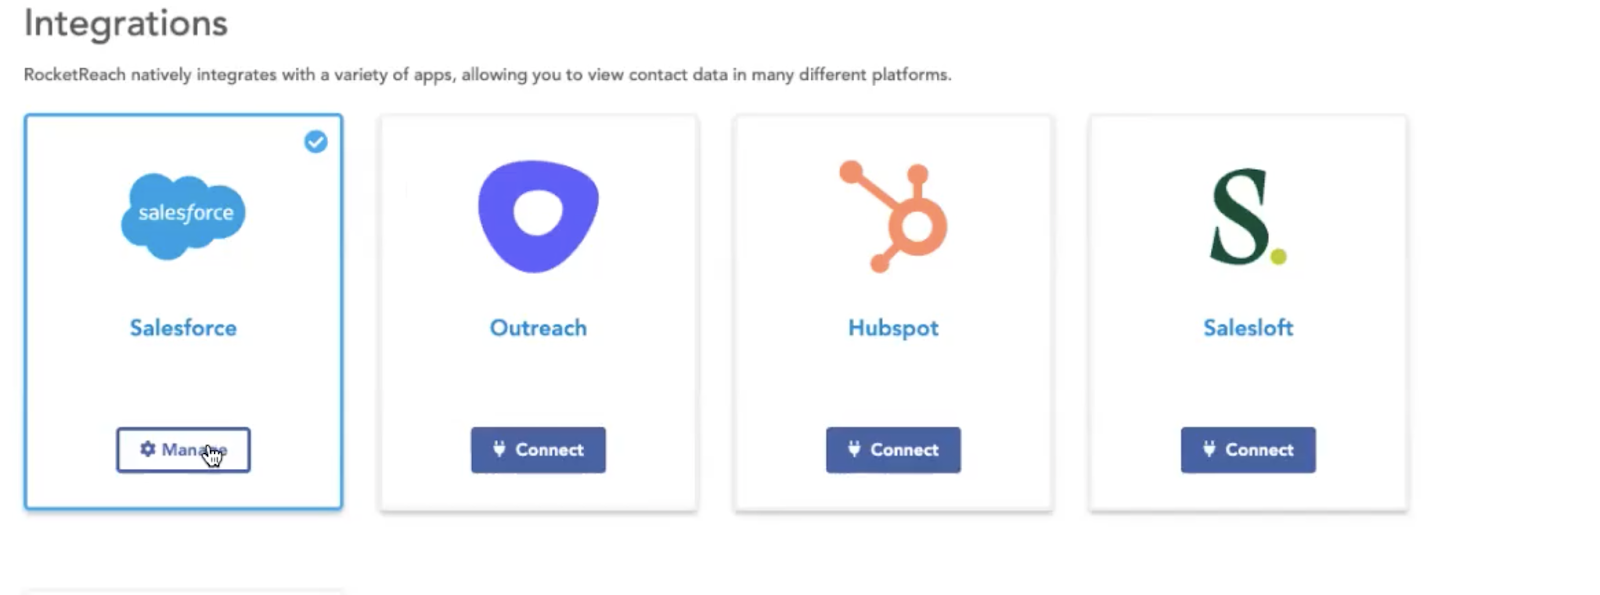
To manage your custom Salesforce mapping, first visit the integrations page and select 'Manage' on the Salesforce tile:
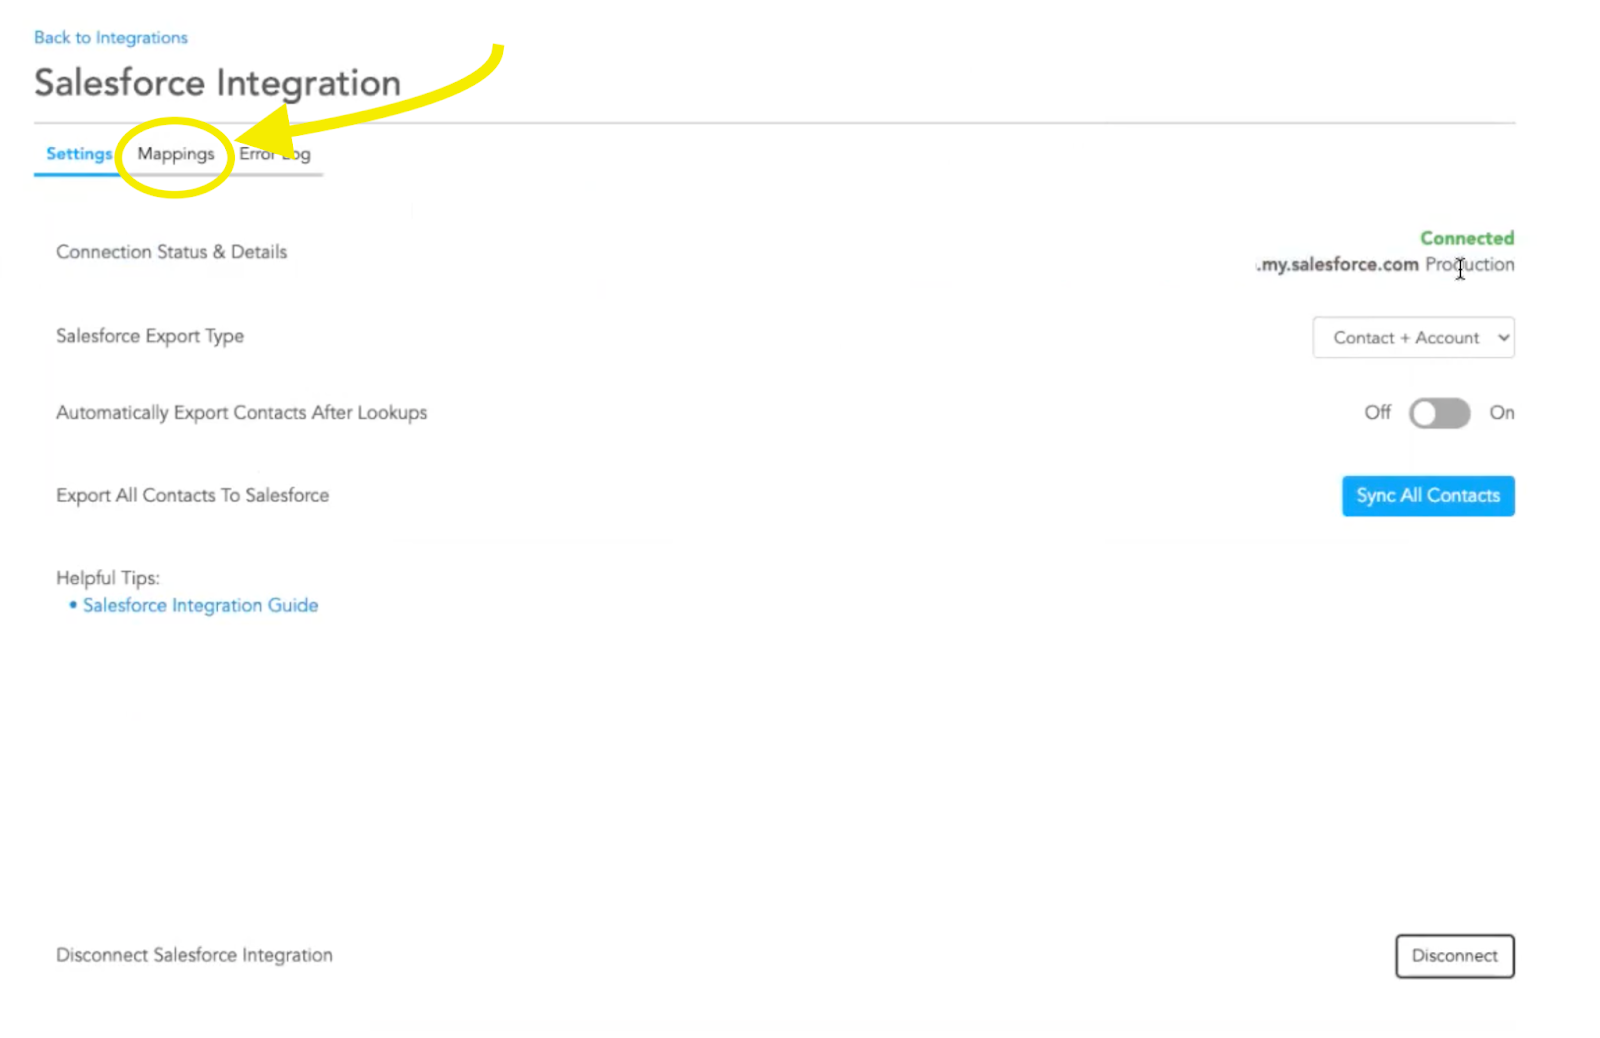
Then, choose 'Mappings' from the tab navigation:
From the mappings table, you can separately manage each Salesforce object: Lead, Accounts, Contacts.
Let's Break Down the Table

RocketReach Field - The data that is available to export to Salesforce.
- You can use each data type in the RocketReach fields multiple times in your custom mapping table.
-
You can create a custom value RocketReach field. This will transfer anything you type in the “Example” static value into the mapped Salesforce Field for all exported contacts based on your "update action" settings below or by creating a new record in Salesforce.

Example - Static examples of what data might be exported.
Salesforce Field- Where in Salesforce the selected RocketReach data will go. Each Salesforce field can be selected only once during custom mapping; a Salesforce field cannot be mapped to multiple RocketReach fields.
Update Action - Choose what happens during the export if a duplicate contact is found to already exist in your Salesforce account. Let's take a closer look:
- For this field, you can choose between "Fill if Blank" or "Overwrite".
- To understand the action of each of these options, you should first understand our deduplication logic for our Salesforce integration. This information (and more!) can be found in our Salesforce Integration article and also in the reference photo below.


- Once we have moved through that logic and either determined that this contact does not already exist in Salesforce or that we were able to locate a match for this contact, what you choose in "Update Action" will tell the integration what to do next.
Fill if Blank - This option will not replace any existing data you already have in Salesforce and will instead add to by filling in the data we have if the mapped Salesforce Field is blank.
Overwrite - This option will fill all corresponding Salesforce fields when we find a duplicate contact, replacing the existing data in Salesforce with the RocketReach data for that field.
The mappings table also allows you to delete rows and create new rows, to tailor RocketReach mappings to your Salesforce custom fields.
Important Notes
- If you have created a custom field in your Salesforce account and marked it as required, you will need to map this field in the RocketReach custom mapping table. If not, we will be unable to create the record because we will be unable to populate the required field.
- If you want to change the Salesforce field to something that isn't listed in the Salesforce field dropdown, you must first create that field in your Salesforce account. Instructions on the Salesforce side can be found here.
- If any changes are done to the field configuration in your Salesforce account, you will need to make the applicable changes to the RocketReach custom mapping table.
- RocketReach will take into account any other setting you have defined within RocketReach when it comes to what data to export. For example, if you have professional emails only or personal emails only selected, the export will take that into account if you choose to map a "Recommended Email" field.
Can all Salesforce Fields be mapped using RocketReach's data?
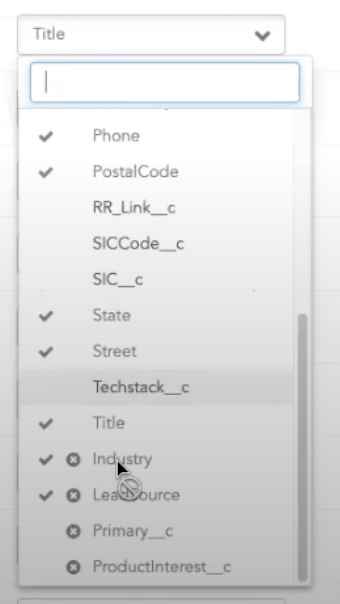
Some Salesforce Fields are unsupported formats and cannot be mapped to RocketReach fields. These fields will still show in your drop-down, but will not be able to be selected. They will be greyed out with an 'X' next to them.
The exception to this is the Industry Salesforce Field. We have pre-mapped this field to specific data and it is included in the default mappings. If you delete the row that contains the Industry Salesforce field, the only way to restore it is by restoring all mappings to default.
Test Mappings
Be sure to test your mapping selections before saving!
Clicking the "Test Mappings" button will create a test record in Salesforce, so you may receive a notification that a new record was created when you take this action. We will automatically remove the created test record once the testing is completed.
❓ If you have general questions about the Salesforce Integration, please see: How do I connect my RocketReach account to Salesforce?